Welcome!

Thanks for stopping by my little blog! Enjoy looking around, and please say Hi!

Tuesday, December 21, 2010

Botched Caramel to Scrumptious Caramel Cups!

One more yummy treat before Christmas.
There really is no bad time to post something for your taste buds am I right!?

For one of my to-pass-out-Christmas-treats I wanted to make caramel.  
I made some a year or so ago.  It was good but turned out too soft.  Then I tried a few months later and it was break your teeth caramel.  This time I tried using a candy thermometer. . . apparently a faulty thermometer.
My caramel tastes super good, but is once again spoon caramel.
The last thing I need sitting around my house is a whole bucket of caramel, so I just had to figure out a way to still give it as a treat!
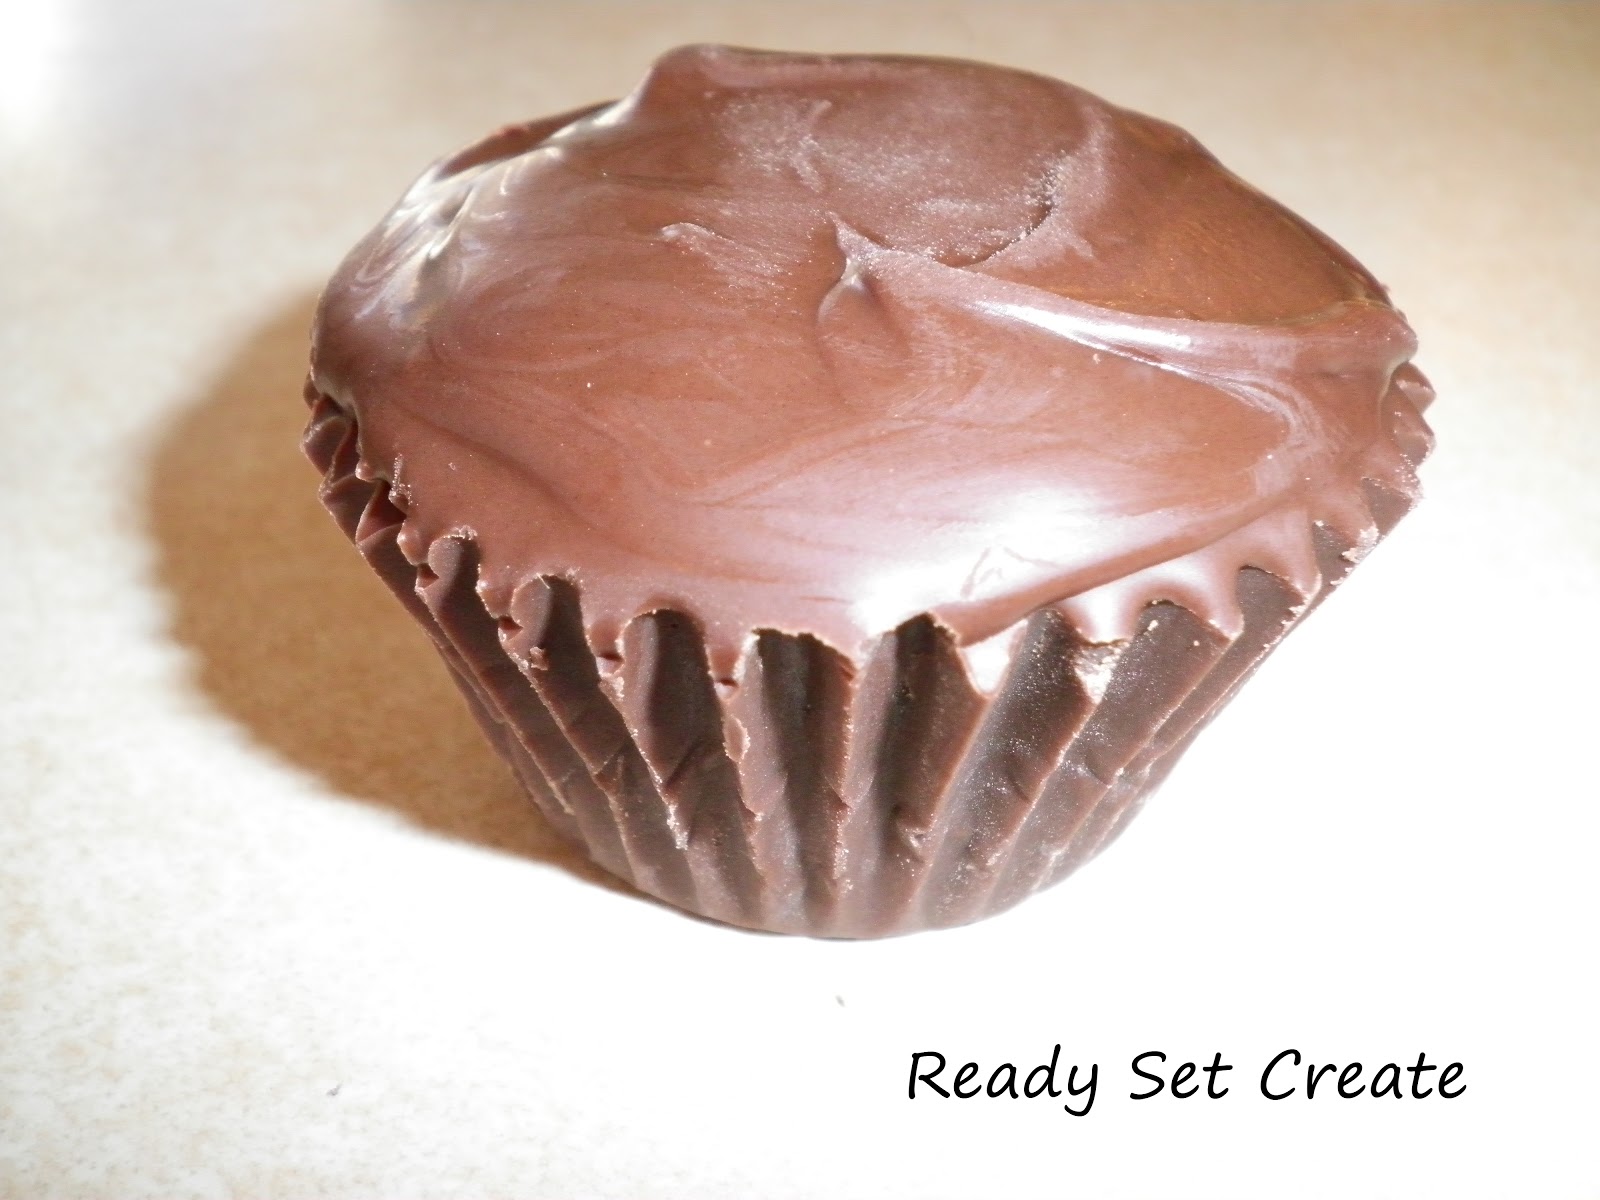
Presenting my chocolate caramel cups!

Here's a super quick rundown of what I did.
I started with mini muffin papers in my mini muffin tin.I filled each one about half full of melted chocolate.
Next I took my spoon caramel and took about a teaspoon and rolled it into a ball and pressed it lightly into a chocolate filled cup.
 A little drizzle of chocolate on top to make sure all the caramel is covered, then let them cool.
 As you can see I made some white chocolate and some milk chocolate.

And let me tell you, they are de-licious!
The caramel is the perfect consistency, and it the whole thing just melts in my mouth!
 So, I still ended up eating way too much yumminess, but at least I can still give most of it away.
So, go ahead and drool, and I'll eat one for you.  {Your welcome!}
A perfect solution to a whole batch of botched caramel. . . Phew!

Oh, and a very

Merry Christmas
and 
Happy New Year
to you all!

I'm so thankful for all of you and hope your holidays are wonderful!


Sunday, December 19, 2010

Melting Snowman Cookies

Here is a super cute and fun Christmas/Winter treat.
Super yummy, almost too cute to eat, melting snowman cookies!
These cookies would make great Christmas treats, but they would also be fun to make any time through out the winter season.

Here is how I made them.
I started with sugar cookies. . . just plain ol' round sugar cookies.  While they were baking I started making my snowman's noses.
I used regular melting chocolate.  I just used white and added a drop of yellow and red food coloring to turn it orange.
I used a piping bag and onto wax paper I piped tiny little orange peaks.
Now put them in the fridge.
 I made a ton of them and then chose the best looking ones to use.
Next start on your heads.
If you can find some round white candy, I seriously suggest you use them!
White whoppers would be perfect, but I couldn't find any so I used regular whoppers dipped in white chocolate.
While the chocolate was still wet I put on the hardened noses.
 Once the cookies are cool its time to frost!
Any white frosting would work for this, but I used thinned royal icing because I love the way it looks.

 Pipe the icing on the cookies in an uneven squiggly way so that it resembles a puddle of melting snowman.
It can even run off the cookie.  I think it adds to the look of it.
before the icing hardens don't forget to put on your heads.

Once the icing dries its time to add the little extras.
I used chocolate for the arms and buttons.  Just melt it and pipe it on.  Easy Peasy.
For the face I used black gel that I got from the icing section at the grocery store, but melted chocolate would work too.
Get as creative as you want with this part.
Some of my snowman are a little surprised to be melting, like the cute little guy above.
Some of them are happy, cuz they know its just a part of life.
 And some of them are just content to be, like this little guy here.  
{I think he might be my favorite}
 I think my family will enjoy these little guys!
Super cute right!? 
And a little spin on your traditional sugar Christmas cookies.

Happy Christmas baking!


Thursday, December 16, 2010

Today I Will Be. . .

. . . enjoying the Christmasy view from my living room window while sipping some blueberry tea.

Listening to some Holly Jolly music while I finish wrapping all my Christmas presents!

And if I feel like it, I just may finish up my Christmas treats.

I'm glad I could send so many of you personalized Clean Hands images!
Anyone else who wants one, you've still got time.

I'll be back tomorrow with something more crafty for you.
But for today, take some time to slow down and enjoy the season!


Monday, December 13, 2010

Clean Hands Gift Idea

You may or may not have seen these before.
My aunt gave one to my mom a few years back and since then I've seen different versions around.
{I'm pretty sure these are a wide spread Relief Society craft}
Anyway. . . I decided to make my own this year!
Cute, inexpensive and totally personalized!  A perfect gift in my opinion!
 All you need are some bottles of soap with all labels removed and this cute Clean Hands dealy-o printed onto a transparency.
Do you remember transparencies?  Back in school before all the new-fangled fancy smart boards and everything, the teachers used the projector and clear plastic transparencies.
You can get these printed at most print shops.
{However I did try our small town shop and when I asked the girl if they made transparencies she looked at me like I was speaking a different language.}
But Kinkos did it no prob. 
I printed 4 to a sheet, for $.80 total. . . awesome!
 All you do is cut them to size, kinda roll them up so they fit in the bottle, then straighten out with your fingers or the long pump stick thingy.
Add a little ribbon if you want and there is a super cute gift!
These would be perfect for family, neighbors, even a teacher for their classroom!

So please feel free to use my image and save it and print it to make your own!
Since I love all of my dear followers, if you would like one personalized with a family name like mine, email me the name(s) and I'll send them over too you in .jpg format.  
This is a limited time offer. . . Once it gets closer to Christmas and I get super busy, Y'all are on your own. . . But I of course still love ya!


Thursday, December 9, 2010

12 Days of Christmas for the One you Love!

I love Christmas traditions!
There are so many different, fun things that we do only around this time of year that makes it special.
One tradition that many people do is some variation of the 12 days of Christmas.
Growing up my family used to give 12 days of surprise gifts to friends or neighbors.
It was lots of fun and a great way to serve and think of others.

This year I've got a little something else planned.
{Hubby if you happen to be reading this, STOP RIGHT NOW!}
If your not my hubby, proceed to the next paragraph.

Yes, I'm going to do the 12 days of Christmas for my sweet husband!
He is so special and I just wanted to do a little something extra for him.

I did it pretty simply, no gifts to wrap, just an envelope for each day.
Inside each envelope is a cute card that has something written on it.  Some days are fun activities for us to do together {like watch a movie, build a snowman, or go out to dinner} Some days are nice things I will do for him {hot oil massage, make his favorite treat} and some days are complements and things I love about him!
{I did about 4 card of each; activities, acts of service and kind words but you could do whatever you want.}
Aren't these cards the cutest things ever?!
I wish I could say that I made them, but I did not.
I downloaded them from Just So Scrappy.  She sells digital scrapbooking kits and gives lots of cute freebies which I just love!
 I added my text to these freebie cards and just had them printed at walgreens.  Easy Peasy!
Figure out which order you want them to go in {make sure not to put all the best ones first or his expectations will be way too high} and put them in envelopes numbered 1-12.
Then display them!  I just hung a cute ribbon on the wall and clipped my envelopes to them!
 Now I plan for my 12 days to end on Christmas Eve, therefore day one will be Dec. 13th.
But feel free to hang up your cards a few days early so your man can get excited about all his surprises!
 How special he will feel that you spent so much time thinking just of him, and that you want to do all these nice things for him!

Thanks for stopping by and Happy Crafting!


Monday, December 6, 2010

Christmas Subway Art Printable

So I love subway art, I love digitally creating things, and I love printables.
Plus I have this especially-for-printables frame on the entryway table.

So presenting, my super cute Christmas subway art printable for me and you!
 Its another perfect reminder of the importance of the season, and it is perfect next to our cute nativity set and my fab countdown blocks!
 So feel free to add one to your holiday decor!
It would also make a perfect holiday card, just print it on a piece of card stock, fold and there you go!

 Here are two slightly different versions.  I made one and thought it needed a little tweaking, thus the second one. 

 Just right click, save and print!
Feel free to share, just give the credit to you know who! {me}

Merry Christmas and happy printing!


Thursday, December 2, 2010

12 Crafts of Christmas part 12 - Gift Idea - Lemon Sugar Scrub!!

Well, today is Christmas craft #12!
I hope you've found some things that have interested you.
Today's craft is one of my favorites!
Lemon Sugar Scrub!

Things you'll  need:
Cute little jars or whatever you want to store your scrub in
Printed tags
Ribbon
Granulated sugar
Oil (which ever kind you prefer)
Lemon Juice
Lemon rind grated
Vitamin E oil

First step is to start mixing together your ingredients.
{Now these measurements are approximate cuz I added an extra sprinkling of this and that along the way - also these measurements fill approximately 3-4 small jars}
3 C sugar
1 C oil
1/4 C lemon juice
rind of 2+ lemons 
1-2 t. vitamin e oil

 Mix it all together and add more oil or sugar depending on how thick you like it.

I got a whole bunch of little jars from the craft store for that work perfectly for the sugar scrub!
 Now fill up your jars then tie on your cute little tags.
If you like my tags, feel free to borrow them!
 Now you're done!  
If you have some tiny spoons they take the cuteness up a few notches, but if not, no worries.
I think everyone would love some yummy smelling sugar scrub!
And when I was done making this, my hands were so soft!  I am, of course, going to keep some of this for myself! :)

Well, thanks for stopping by and having a look!
Happy Christmas Crafting!


Wednesday, December 1, 2010

12 Crafts of Christmas part 11 - Neighbor gifts in a jar

For today's craft we've got great gifts for your neighbors and mine!
Brownie mixes in a jar!
These are perfect for a few reasons, one they are easy, and two if you're like me and don't want tons of baked goodies around the house, these are the neighbor gifts for you!


 As you can see I made two different kinds.
The first I used my basic brownie recipe and measured out each ingredient.
Then I layered them in the jar.  
Chocolate chips, brown sugar, white sugar, cocoa, then the rest of the dry ingredients.
 Next step is to cut your fabric and secure it over the lid with a rubber band, then tie a decorative ribbon over the top.
 I finished it up with this cute tiny spatula. {good luck finding one. . .I've had this one for years and couldn't find any more. . . if you know where I can get more, let me know!}
 Option B is for you if you want to spend even less time!
I layered chocolate chips, walnuts {marshmallows optional} and then poured on half of a boxed brownie mix on top of that!  Easy, and one box fills up two jars!!  Woo Hoo!
 Now decorate your jar!
And of course, don't forget to add a tax letting your recipient know what to add and how long to bake.
We just printed them on labels and stuck them to the back of a cute gift tag!

It took me longer to type this post than it did to make these two jars!  :)
These gifts are especially great because your recipient can make them whenever. . . Maybe right away, or maybe in a month or two when they want a sweet treat!  Also they store great so you can have an extra jar or two on hand just in case someone unexpectedly stops by your place with treats.

Hope this gives you an extra idea to either use or to file away!
Happy Christmas crafting and treat making!


Related Posts with Thumbnails