Welcome!

Thanks for stopping by my little blog! Enjoy looking around, and please say Hi!

Monday, March 29, 2010

Yummy (And Easy) Chicks and Bunnies for Easter!

I saw this great idea from The Popcorn Factory as a yummy and totally adorable Easter Treat.
But, rather than pay and arm and a leg for it, I decided to try and make my own! And If I do say so myself, they turned out great!

To make my bunnies and chicks I drew them on some wax paper to be my templates.
I flipped it over of course so I don't get Sharpie in my chocolate, then I used a piping bag full of melted and tinted white chocolate and just made my little animals. It was totally easy.
While they sat and hardened I made some rice crispy treats.
Once it was all cool and hard I covered the rice crispy treats with more melted chocolate. before the chocolate hardens I lightly pressed each chick and bunny on to my treats. I put them on smooth side up so no one will ever see all the imperfections on the bottom..

The next step is to decorate. . . I used half a mini marshmallow for each bunny tail, I used a toothpick with milk chocolate to make my chicks eyes. Another piping bag with some orange chocolate made my little chicks beaks and feet.
Let it all cool, cut, and enjoy!

Aren't they cute?!
And they taste as good as they look!


Wednesday, March 24, 2010

$4 Cupcake Stand / Lemon Centerpiece

Easter is on its way, so is Spring. . . I think. . . There is still lots of snow around here.

I've got a fun craft that is super easy, super cheap and totally versatile!
Get ready to make your very own cupcake stand!

I'm so excited about this, it can be used for so many things and it only cost me. . .
Wait for it. . .
$4.00

That's right, four big ones!

I started with two glass plates, one dinner and one salad plate. . .
And two glass candle holders.
A little Gorilla Glue on the top of each candle holder. . .
Glue them to the bottom of each plate. . .
Weigh them down with something heavy. I left them sitting over night to make sure they were good and stuck.

Once they are nice and dry, stack the small one on top of the large one, and Presto!
Your very own cupcake stand!
Look how pretty and fancy they are! Perfect for Easter treats!

You could glue the two together so you have just one piece, but I left mine as two pieces so I can use them separately when I want. The large plate would make a great cake stand!
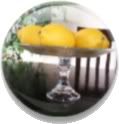
When I don't have tasty treats to serve or display I plan on using my stand for my lemon centerpiece on my kitchen table. . .
Look at that!! L-O-V-E it!! It makes my place feel so Spring-y!

I'm totally linking this up to Living With Lindsay's Five Dollar Challenge.

Now go hit up the dollar store and make your own!


Wednesday, March 17, 2010

Chunky Beaded Jewelry

I just love all the cute chunky beaded jewelry I see in all the stores. For a while I've been collecting various big beads so I can make my own.

I found some cute chunky pearls at (where else?) Hobby Lobby, and lots of other beads in fun colors at the thrift store. (Ugly jewelry cut apart = new beads for me!!)
So, My collection of beads, + some stretch magic jewelry elastic + ten minutes . . .
=Fun new bracelets for me! And super cheap might I add! I've still got plenty more beads, so one day there will be a whole family of chunky beaded jewelry!
Yay!! I just love new accessories!


Tuesday, March 16, 2010

Fabric Flowers For Spring!!

I really wish it was Spring. . . We've gotten a taste of it here and there with a warm day or two, but tho snow always comes back. So, If the earth isn't ready for flowers yet. . . I'll make my own. Yay!! I saw a really cute flower at Blue Cricket Design where she made a cute flower pin. I used her tutorial and they are so great!

I started with a simple flower design. I Googled it and found this one I liked here. I printed it and reduced and enlarged it to get the sizes I wanted. Then I cut four flowers out of each of the two biggest sizes and one of the smallest.
I folded all but the smallest flower into quarters, and hand stitched them to a piece of felt. I loved the idea of folding them into quarters. . . it gives the flowers so much more dimension.

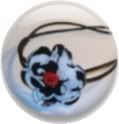
The last little flower went on top with a cute button to finish it off. I love it! And I'm totally in love with this black and white fabric right now too!I made a few of these flowers and even attached one to a headband. . . Too Cute!!

So while you wait for Spring to bring you some flowers from your garden, why don't you make a few of your own?!


Friday, March 12, 2010

Follow Me Friday

Visiting from Follow Friday or New Friend Friday??? Thanks for stopping by! Have a look around and feel free to leave a comment or two, or three. :) My blog is small, It was just born not too long ago, so don't rule me out just yet. . . I've got plenty of ideas cooking!

I love seeing new blogs and getting to know new people! So, let me be your new blog friend!

Happy Friday!!

Fun With Buttons!

Fun with buttons is right! I have thick hair and can never find hair ties that will hold my hair back, unless they are way too ugly to wear. How do I solve that problem?? Make some of my own. This was totally easy, and I'm quite happy with how they turned out. . . I'll be making some more.

I started with a scrap of fabric and a button making kit from Hobby Lobby. . . Thirty seconds later I had my button!Next I tied the button to a plain ol' black elastic band. (please excuse my really zoomed in fingers in this pic.) I just used some thick black thread and tied it around a few times with a few good knots.
Ta-Dum!! Next step. . . try it out in my hair.
And look! A five minute craft that is cute, AND keeps my hair in place! Ah! Its gonna be a good day!

Tuesday, March 9, 2010

Fabric Covered Bracelets

I made myself some totally fab bracelets. . . take a look.

I found these. . .
. . . bracelets at the dollar store. I thought they had some potential, but were not quite to my liking. All I needed was some scraps of fabric, and some fabric glue.

The first bracelet I wrapped in fabric, using fabric glue to secure the ends, and to hold it together on the inside of the bracelet.


The second one (turned out to be my favorite one) I cut one looooong strip of fabric and wrapped the bracelet. I only used the glue on the ends to secure them in place.

I like the way the frayed ends of the second one look, gives it extra character and fun-ness!

Totally cute, totally cheap, made just the way I want them and now I love them!


Friday, March 5, 2010

Bill Holder Makeover!

We have this bill holder that we love! We have it hanging in our kitchen and it helps us so much when it comes to staying organized. It is a hand-me-down from my wonderful mom, so needless to say, It has been well loved.

I'm about to turn it into, This. . .
Here is the original . . .
Well loved and ready for a makeover!

A good sanding, a couple coats of paint, and some paper fitting and cutting later. . .

The final product!
I used the Mod Podge to glue and seal the paper onto the front of it. It only took a few coats.

I L-O-V-E the way it turned out! Ant this fits my style and decor more than the fruit did. And this cost me nothing. . . I already had the supplies. Now that's my kind of project!


Monday, March 1, 2010

Wall Collage

A new house with lots of empty walls is a project in and of itself. I saw a great idea from Make it and Love it to do a picture frame collage on the wall!

I started with the empty wall in our entryway. I cut out pieces of paper the same size as all the frames I wanted to use and started arranging the papers on the wall in stead of the pictures. This way I wasn't making extra holes in the wall. Wonderful!
It took me quite a while to get it just the way I want it, but once I had it, Voila!! It turned out great, and I love it!!
Look at all the wonderful pictures I get to display now!
I'm going to have to use this technique again!


Related Posts with Thumbnails