Welcome!

Thanks for stopping by my little blog! Enjoy looking around, and please say Hi!
Showing posts with label Easy. Show all posts

Monday, May 16, 2011

From Photo Album to Fab Recipe Book!!

Does anyone else have piles of recipes, recipes sticking out of every recipe book, recipes crammed in kitchen drawers???
Well, I don't anymore!

I made a recipe book from . . . a photo album!
Brilliant, and absolutely perfect!
Plenty of room for all my recipes, i can add and remove recipes whenever I like, and since they are in the little plastic sleeves they stay clean, even when spill and drip everywhere!
It is super easy and customizable.  
*Fabulous!* 

So here is what I used;
photo album
dividers
hole punch
recipe cards/printouts

The bulk of the work was already done for me because I started with a photo album.
Here is what the finished project looks like.
First step, cut the dividers the same size as the photo album pages.  Make sure to keep the side with the tabs on it.
Cut as many as you need and hole punch in the appropriate places.
 Add your category titles in your tabs.
Its perfect because you can add whatever categories you use most.
 
 All thats left is to insert all your favorite recipes.
The photo album is great because the photo openings are just the right size for your recipe cards.
I had all my recipes typed up on the computer and just printed them out in 4x6 format and voila!
They fit like a charm!


 Ahhh, look at those super organized recipes!
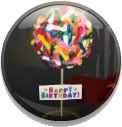
 All that was left was to add a little title to the front of my new recipe book.

Go ahead, Make one!


Thursday, September 9, 2010

Fabric Covered Canvas

I wish I was one of those people who is super talented with a paintbrush.  If Its a room that needs painted, I'm your girl. But if its a pretty design or picture that needs painted, Um, that's not for me!  

But C'est La Vie!
I am however, queen of the staple gun!
So pull out yours and lets get going on some of these beauties!
I L.O.V.E. them!
These really were as easy as cut, wrap, and staple!


This way you get the look of a nicely decorated canvas without the mess and hassle of painting!
Good to know that I don't need to be a world class artist to make something beautiful!

Tuesday, August 10, 2010

An Unlikely Piece of Art

Need a quick easy piece of artwork for a sad empty wall?
Me too.
Here is what I came up with.
Believe it or not this cute picture was once a gift bag found at, none other than the dollar store.

All you need are a couple gift bags (that are way too cute to spend their lives being only gift bags) and a couple floating frames.

Its as easy as cutting up the gift bags and sticking them in the frames.
They don't look like gift bags hanging on the wall and I totally ♥ them as pictures!
It adds a little something to our guest bathroom.
There are so many cute gift bags out there that the possibilities are endless!

So next time your looking for a gift bag, use your crafting eye and see what kinds of ideas come to you!


Friday, June 25, 2010

Yes. . . Another Necklace!

I know, I know! But yes. . . I have another necklace for you.
But cut me a break, its a really cute necklace!

See?!?!
So totally cute right?!
You'd never know it was made from a button.

Here's how I did it.
I got the button from WalMart.
First I clipped off the back of the button with some wire cutters.
Then I sanded it down more with a metal file.
Next I glued a bail to the back and let it dry for a few hours.
(No one will ever see the back of the necklace, but if you want it to look a little better of if its a little too scratchy against your skin you could always glue a little circle of felt or black fabric to the back.)

Then you have a cute new necklace pendant!
Just put it on a chain and you're done!
I ♥ it! Its my new favorite necklace!


Friday, May 7, 2010

Dressing Up A Empty Wall

Do you love a good bargain?
I sure do!
I love when I can find or make something for practically nothing! (as you probably know from many of my previous posts.)

Here is some simple wall art that I made for one of our guest bedrooms that until today had some very empty walls.

I started with four dollar store frames,
four pieces of scrapbook paper that matched my guest room decor
and some vellum
I printed some ornate decorative designs on two pieces of vellum to liven up my art a bit. . .
I put them all together, and there is a now a little decor in our guest bedroom. One of my poor empty walls isn't so empty anymore.


Monday, May 3, 2010

Cute Button Rings!

I'm totally into making my own jewelry right now. I love to wear something new that I've made! Most recently I made the cutest and easiest button rings.

If you're looking for a quick, easy project with fab results, this is it!
Three steps and your done.

The supply list is also totally short. . .
A tiny bit of fabric
Button Making kit
Mod Podge
Metal Adjustable Ring Base
Glue Gun

1. Make yourself a couple fabric covered buttons (the same ones I used here.) Button making kit can be found at Hobby Lobby or probably any craft store.


2. Put a couple of coats of Mod Podge on your button (this step could be skipped but the Mod Podge will make it shiny as well as keep it nice and clean.)

3. Once the Mod Podge is dry, Hot glue your button to your ring base.
And there you have it! Cute!


Monday, April 26, 2010

Something Pretty For Mom

Mother's Day is right around the corner. . . What are you giving your mom to show your love and appreciation?

Here is a great (and totally simple) idea that I think any mom will love.

This particular gift is going to my sister, so the pictures are of my totally adorable niece.

I bought some white wooden letters, an M and an O and took pictures of the beauty queen holding the letters.
Isn't she just a doll?!

I turned the pics black and white so the letter would stand out more. I even tried editing it to change the color of the letter.

I decided I liked the white letter better. I chose my favorite pictures, chose a frame with three openings, and here is the final product.
I think my sis will love it. What mom doesn't love cute pics of their babies?!

The great thing about his gift is that it can be personalized for anyone, and any occasion. Just change the letters. You could spell out your last name, or really just anything. I'm also making some with six pictures that will spell "MOTHER" and "FATHER". These aren't ready yet cuz I haven't found the right frames yet.


Tuesday, April 20, 2010

The Grass is Always Greener When its Fake

I needed a new decor item for my sad empty shelf in our bedroom.
Something Spring-y/Summer-y,
something cheap,
something easy.

Here is what I came up with.
Totally cute right?!

Here's what I did.
I started out with two bundles of fake grass, one square glass candle holder and some small polished rocks. (All from the dollar store by-the-way.) And my ever trusty glue gun.
I unwrapped the bundles of grass and inside it was made up of tiny bundles.

A dab of glue on the bottom of each tiny bundle of grass is all you need to stick it firmly onto the bottom of the candle holder.
Start in the middle and make your way toward the edges. Continue gluing until you have as much grass you you want. Be sure to leave a space around the edge. Not too much, just enough to stick a few pebbles in at the end.
A few smooth stones around the edges covers up the not-so-pretty bottom.
Look at that! Totally fab for only four bucks!
Perfect to add a little green to any area!
My Hubby even liked it so much he said I should make more to put in other areas.
Always a success when even he likes it!


Tuesday, April 13, 2010

Candles, Candles, Candles!

I love candles. . . I think they are a great part of home decor. I had some ugly-too-small-not-a-good-color-blue tea light candles that I got from the dollar store and I turned them into candles that are the size and the color that I want. SO Easy, and a Great end result!

Here is what I did.
I started by breaking up all the candles and putting them in a bowl. I added some white candles so it would soften up the original ugly blue color. I saved the wicks and reused them.
I don't have a double boiler so I put a glass bowl on top of a pan of boiling water, and it melted the candles like a charm!

While they were melting I set up my molds. I had some plastic molds from some old tea lights so I used a couple of those, but for the rest I just used a plastic Dixie cup. Stick a wick in the center and just pour in some melted wax! Easy as Pie!
Let the wax sit and harden for while. The Dixie cups and the plastic molds just come right off, and you've got some new candles!
Awwww. . . Look how pretty!
This would be easy for anyone (even kids) to do. I have some old half used candles that I want to melt down and see what I can do with them.

Give it a try and Happy Melting!


Friday, March 12, 2010

Fun With Buttons!

Fun with buttons is right! I have thick hair and can never find hair ties that will hold my hair back, unless they are way too ugly to wear. How do I solve that problem?? Make some of my own. This was totally easy, and I'm quite happy with how they turned out. . . I'll be making some more.

I started with a scrap of fabric and a button making kit from Hobby Lobby. . . Thirty seconds later I had my button!Next I tied the button to a plain ol' black elastic band. (please excuse my really zoomed in fingers in this pic.) I just used some thick black thread and tied it around a few times with a few good knots.
Ta-Dum!! Next step. . . try it out in my hair.
And look! A five minute craft that is cute, AND keeps my hair in place! Ah! Its gonna be a good day!

Related Posts with Thumbnails