Welcome!

Thanks for stopping by my little blog! Enjoy looking around, and please say Hi!
Showing posts with label Decor. Show all posts

Wednesday, September 22, 2010

Fun Festive Fabric Pumpkins!

Well, I admit it, Fall is upon us.  
While I'm not thrilled about the impending snow storms and the inevitable snowed-in days, I do love fall!
The cool weather, the colors, the leaves changing and falling off the trees, and the fun Fall decor!

Here is my first craft of the season.
Cute, festive, stuffed pumpkins!
Cute right?!  I whipped up two of these babies during an episode of What Not To Wear.

Want to make some of your own?  Here we go!

Start with whatever fabric you're going to use.  Make the width twice as long as as the height.
I made mine 11 inches by 22 inches. 

Next we're gonna ruffle the top and the bottom (the two long sides.)
On the sewing machine use the longest stitches and the highest tension.  Start sewing without pulling the fabric tight and the machine should do the ruffling  for you.  
(if it doesn't then just pull on one of the strings when you're done sewing to make it ruffle up.)

What we're going to do next is sew the two shorter sides together (11 inch sides) right sides together.

Now you'll have a tube with a ruffly top and bottom.  
Gather the bottom together and hand stitch it closed.

Next fill it full of stuffing. . .

Then gather the top and stitch it closed.
This is what it looks like at this point. . . a big round lumpy {almost} pumpkin.

The next step is whats gonna give it that pumpkiny look.
I just used some regular thread and a long needle. . . start at the bottom, and bring your needle up through the middle and then down around to the bottom and up through the middle again as many times as you want - I did it 5 times.
(does that all make sense???)

Now for the stem.  Super easy.
Cut two stem shaped pieces.  They don't have to be perfect. . . what stem is perfect???

Sew them right sides together, flip right sides out and stuff.  Now sew the bottom closed.  It doesn't matter what it looks like, the bottom wont show.

Last step, pull out the hot glue gun and glue on the stem and if you want to a couple fake leaves.
And Voila!  There you have your cute stuffed pumpkin!

Now all you have to decide where to put them!
On the kitchen table. . .

Maybe on the entryway table?

No matter where you put them they will look fab and make a great fall decoration!

Thanks for stopping by. . . Enjoy this beautiful season and happy creating!


Tuesday, April 20, 2010

The Grass is Always Greener When its Fake

I needed a new decor item for my sad empty shelf in our bedroom.
Something Spring-y/Summer-y,
something cheap,
something easy.

Here is what I came up with.
Totally cute right?!

Here's what I did.
I started out with two bundles of fake grass, one square glass candle holder and some small polished rocks. (All from the dollar store by-the-way.) And my ever trusty glue gun.
I unwrapped the bundles of grass and inside it was made up of tiny bundles.

A dab of glue on the bottom of each tiny bundle of grass is all you need to stick it firmly onto the bottom of the candle holder.
Start in the middle and make your way toward the edges. Continue gluing until you have as much grass you you want. Be sure to leave a space around the edge. Not too much, just enough to stick a few pebbles in at the end.
A few smooth stones around the edges covers up the not-so-pretty bottom.
Look at that! Totally fab for only four bucks!
Perfect to add a little green to any area!
My Hubby even liked it so much he said I should make more to put in other areas.
Always a success when even he likes it!


Tuesday, April 13, 2010

Candles, Candles, Candles!

I love candles. . . I think they are a great part of home decor. I had some ugly-too-small-not-a-good-color-blue tea light candles that I got from the dollar store and I turned them into candles that are the size and the color that I want. SO Easy, and a Great end result!

Here is what I did.
I started by breaking up all the candles and putting them in a bowl. I added some white candles so it would soften up the original ugly blue color. I saved the wicks and reused them.
I don't have a double boiler so I put a glass bowl on top of a pan of boiling water, and it melted the candles like a charm!

While they were melting I set up my molds. I had some plastic molds from some old tea lights so I used a couple of those, but for the rest I just used a plastic Dixie cup. Stick a wick in the center and just pour in some melted wax! Easy as Pie!
Let the wax sit and harden for while. The Dixie cups and the plastic molds just come right off, and you've got some new candles!
Awwww. . . Look how pretty!
This would be easy for anyone (even kids) to do. I have some old half used candles that I want to melt down and see what I can do with them.

Give it a try and Happy Melting!


Wednesday, March 24, 2010

$4 Cupcake Stand / Lemon Centerpiece

Easter is on its way, so is Spring. . . I think. . . There is still lots of snow around here.

I've got a fun craft that is super easy, super cheap and totally versatile!
Get ready to make your very own cupcake stand!

I'm so excited about this, it can be used for so many things and it only cost me. . .
Wait for it. . .
$4.00

That's right, four big ones!

I started with two glass plates, one dinner and one salad plate. . .
And two glass candle holders.
A little Gorilla Glue on the top of each candle holder. . .
Glue them to the bottom of each plate. . .
Weigh them down with something heavy. I left them sitting over night to make sure they were good and stuck.

Once they are nice and dry, stack the small one on top of the large one, and Presto!
Your very own cupcake stand!
Look how pretty and fancy they are! Perfect for Easter treats!

You could glue the two together so you have just one piece, but I left mine as two pieces so I can use them separately when I want. The large plate would make a great cake stand!
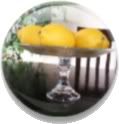
When I don't have tasty treats to serve or display I plan on using my stand for my lemon centerpiece on my kitchen table. . .
Look at that!! L-O-V-E it!! It makes my place feel so Spring-y!

I'm totally linking this up to Living With Lindsay's Five Dollar Challenge.

Now go hit up the dollar store and make your own!


Related Posts with Thumbnails